Hey guys, Welcome to another awesome JavaScript project, or I would say, the advanced version of JavaScript. This project is not just using simple JavaScript functions; this is a much more advanced project.
All my friends who wish to become good developers and want to achieve something in life say,” Learning is the key.” If you decide you can create anything with the help of technology, you just need proper guidance in your life.
Also Read – Magic Card Using CSS
Today I’ll be teaching you some advanced concepts of javascript with the help of multiple Windows projects using the three.js framework. I’ll be explaining the project from scratch.
Note: This project is from bgstaal and the source code can be found on GitHub with this link – https://github.com/bgstaal/multipleWindow3dScene
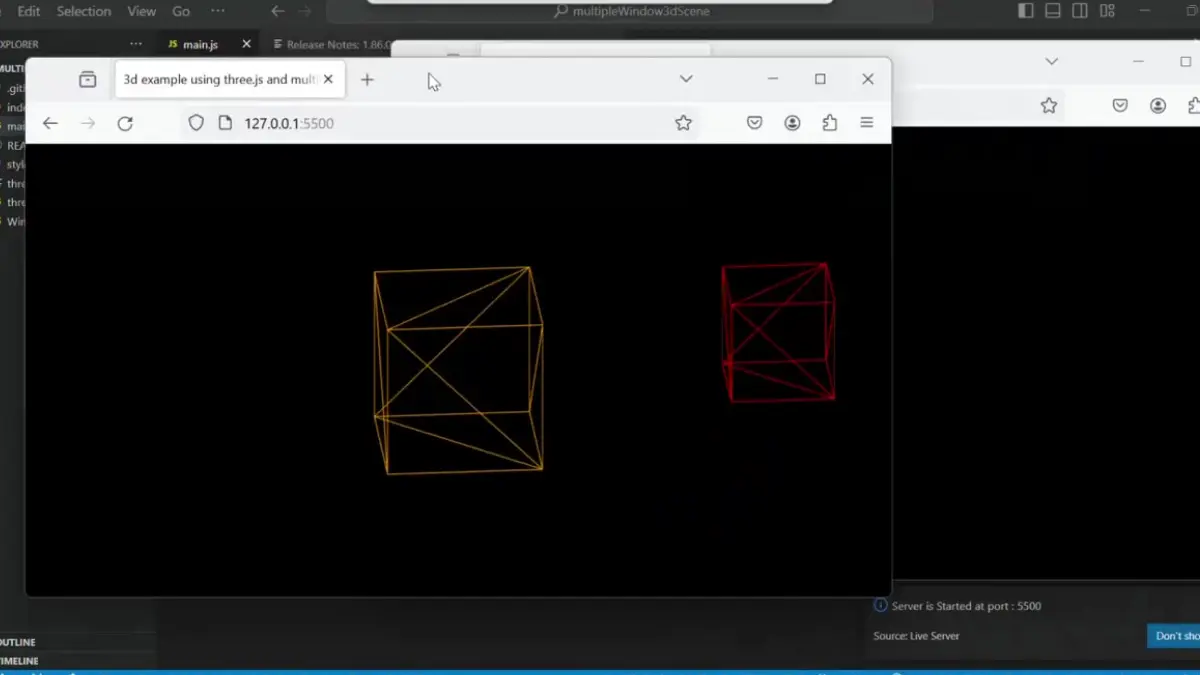
How to create Multiple 3D Window Scenes using Three Js
Step 1: Just copy this command inside the cmd.
git clone https://github.com/bgstaal/multipleWindow3dScene.gitStep 2: A folder will be created in your system. Just check the location on which disk the file is downloaded, then right-click on the folder and just open it with the VS Code Editor.
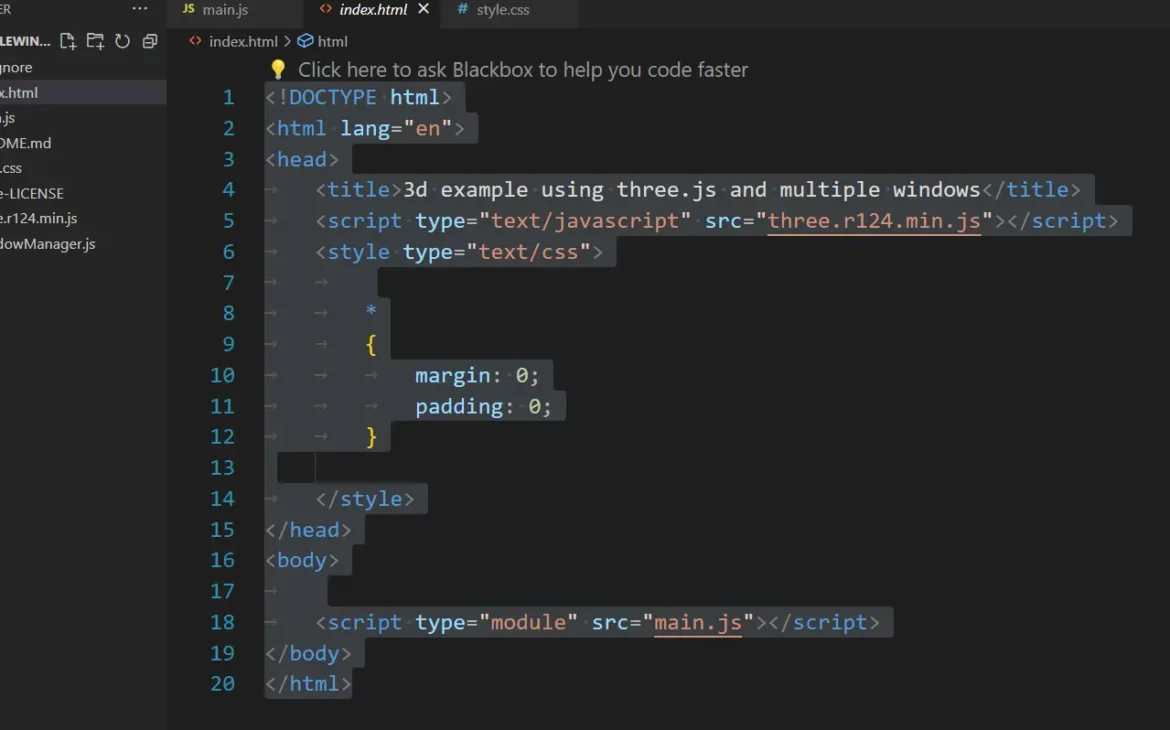
Here you will see three main files. index.html file contains all the necessary links to your project, like CSS and the JavaScript file link.
Note: Before starting our project, you need to understand the basic concept of the three.js framework.
Three.js:
A JavaScript package called three.js is used to produce 3D computer graphics in web browsers. It offers a collection of functions and abilities that make using WebGL—a web standard for 3D visual rendering—easier. Developers can now more easily build dynamic and aesthetically pleasing 3D content for the web by using Three.js, which hides out a lot of the complexity of WebGL.
CSS file:
Inside we have just used a basic CSS property color to set the font color as lavender inside the p tag.
p {
    color: #bdcbe5;
}
We will be now discussing the heart & soul of our project, a javascript file, we have used a javascript library for creating a 3D window design.
Import and Variable declaration:
import WindowManager from './WindowManager.js'
const t = THREE;
let camera, scene, renderer, world;
let near, far;
let pixR = window.devicePixelRatio ? window.devicePixelRatio : 1;
let cubes = [];
let sceneOffsetTarget = {x: 0, y: 0};
let sceneOffset = {x: 0, y: 0};
let today = new Date();
today.setHours(0);
today.setMinutes(0);
today.setSeconds(0);
today.setMilliseconds(0);
today = today.getTime();
let internalTime = getTime();
let windowManager;
let initialized = false;
In this section, we will import the WindowManager module and declare variables for Three. js (t), camera, scene, renderer, world, near, far, pixel ratio (pixR), an array for cubes, and objects for scene offset. It also initializes a timestamp today to represent the start of the day, and internalTime is set using the getTime function. Variables for the window manager and initialization status are also declared.
Function to Get Time in Seconds:
function getTime() {
    return (new Date().getTime() - today) / 1000.0;
}
Using the function getTime() we will capture the time from the user’s browser and then convert the time into seconds.
Condition Check for Clearing Local Storage:
if (new URLSearchParams(window.location.search).get("clear")) {
    localStorage.clear();
} else {
    // Initialization logic
}
Check if the URL parameter “clear” is present and, if true, clears the local storage. Otherwise, it proceeds with the initialization logic.
Event Listeners for Document Visibility and Window Load:
document.addEventListener("visibilitychange", () => {
    if (document.visibilityState != 'hidden' && !initialized) {
        init();
    }
});


window.onload = () => {
    if (document.visibilityState != 'hidden') {
        init();
    }
};
We will not create an event listener on the document file and check if the webpage URL information is hidden or not. We will check with the help of the event listener and then use the window. load (), we will start the 3D window animation.
Initialization Function:
function init() {
    initialized = true;
    setTimeout(() => {
        setupScene();
        setupWindowManager();
        resize();
        updateWindowShape(false);
        render();
        window.addEventListener('resize', resize);
    }, 500);
}
The init function sets the initialized flag, introduces a delay, and then calls functions to set up the scene, and window manager, resize the window, update the window shape, and start rendering. It also adds a resize event listener.
That’s all guys we have created our 3d window scene with the help of the javascript library, if you find any difficulty in creating the same, then just send me your query inside the comment section and I’ll try my best to solve your queries.
Now let’s have a look at our project with the help of a video.
Conclusion
If you like our project and want more advanced javascript concepts then do comment in the comment section #moreprojects, I’ll bring more advanced javascript projects for you.